Stratux Hardware: Parts and Physical Assembly
This section outlines the components used to build a Stratux ADS-B receiver and walks through the physical assembly process. Clear images and details are included to help builders replicate a reliable and compact unit.
Parts Overview
To build a fully functional Stratux unit, you’ll need the following components:
- Raspberry Pi 3B+ or 4
- Two SDR USB receivers (one for 1090ES, one for 978UAT)
- GPS module (e.g., VK-172 USB GPS)
- AHRS/IMU unit (e.g., SparkFun 9DoF IMU with Qwiic header — optional)
- Dual-band antennas
- Plastic clamshell enclosure (with side cutouts for ports)
- Two small cooling fans
- Heat sinks for Pi chipset
- microSD card (8–32GB, high endurance)
- Portable USB power supply (2.4A or higher output)
These parts are widely available from electronics distributors or aviation hobbyist kits.
Internal Assembly and Layout
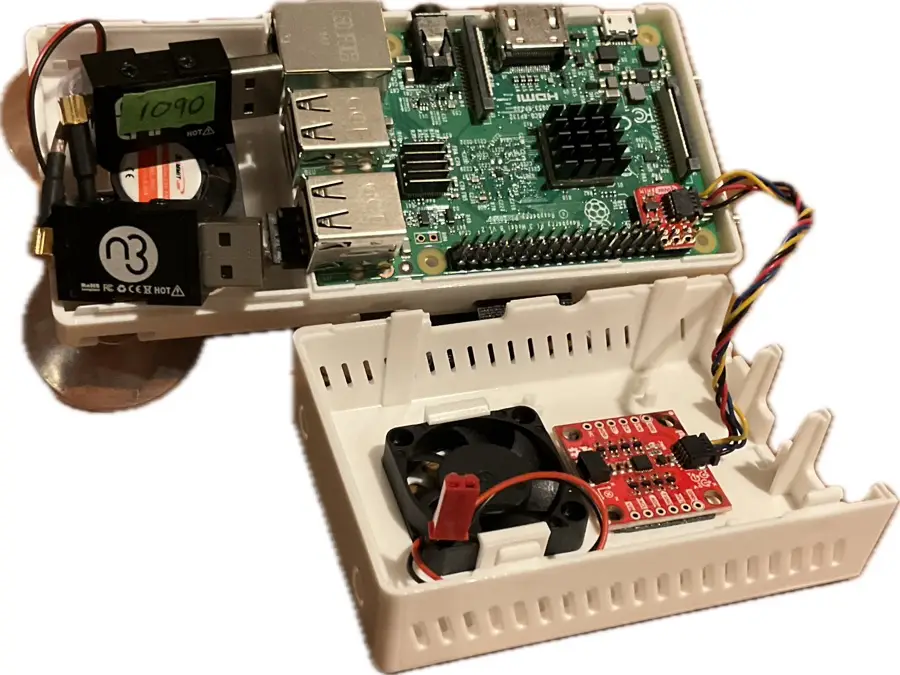
The clamshell enclosure is designed to house all Stratux components neatly, with specific cutouts for USB ports, HDMI, and GPIO access. Begin by mounting the Raspberry Pi securely into the lower half of the case.
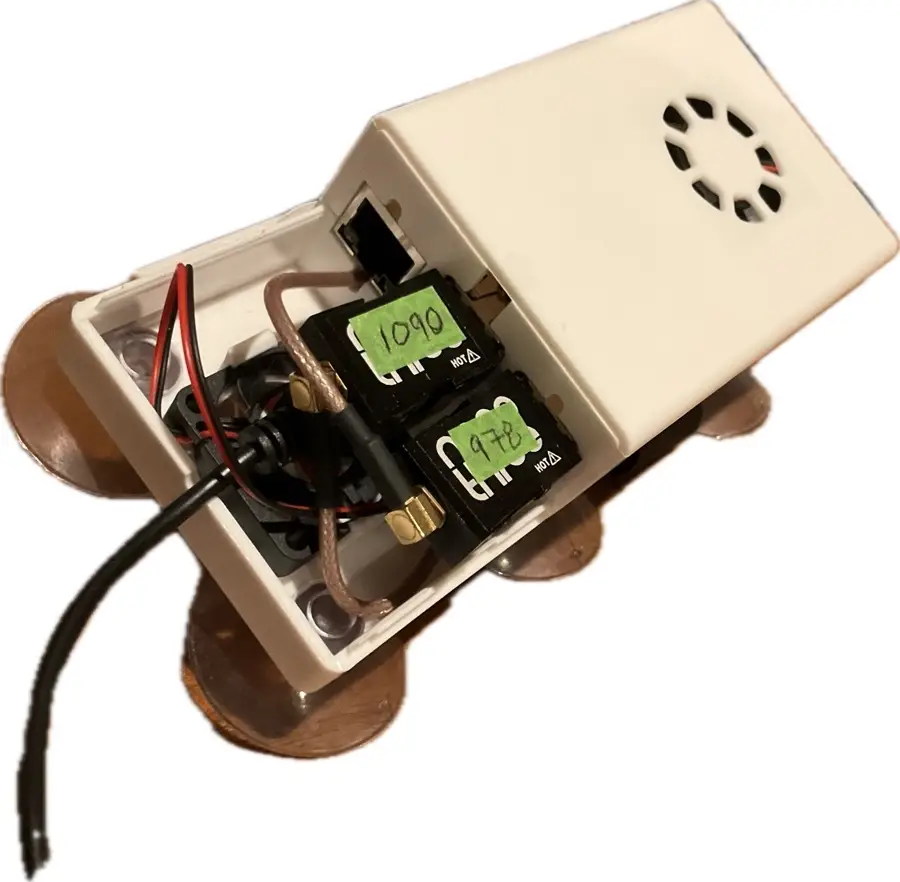
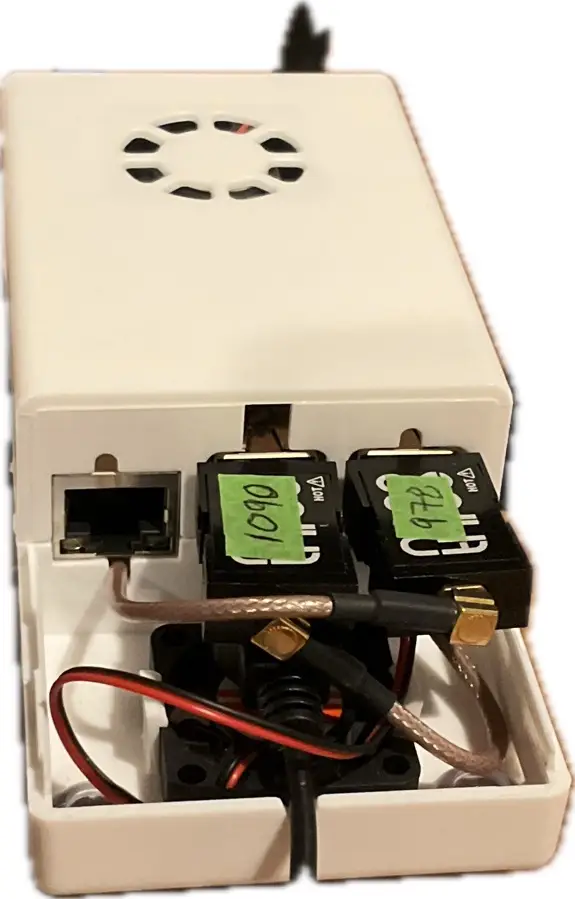
- Install the SDRs into the USB ports and label them (978 and 1090) to avoid mix-ups later.
- Attach the GPS module to an available USB port.
- Wire the antennas using coax jumpers if needed, ensuring each antenna matches the correct SDR.
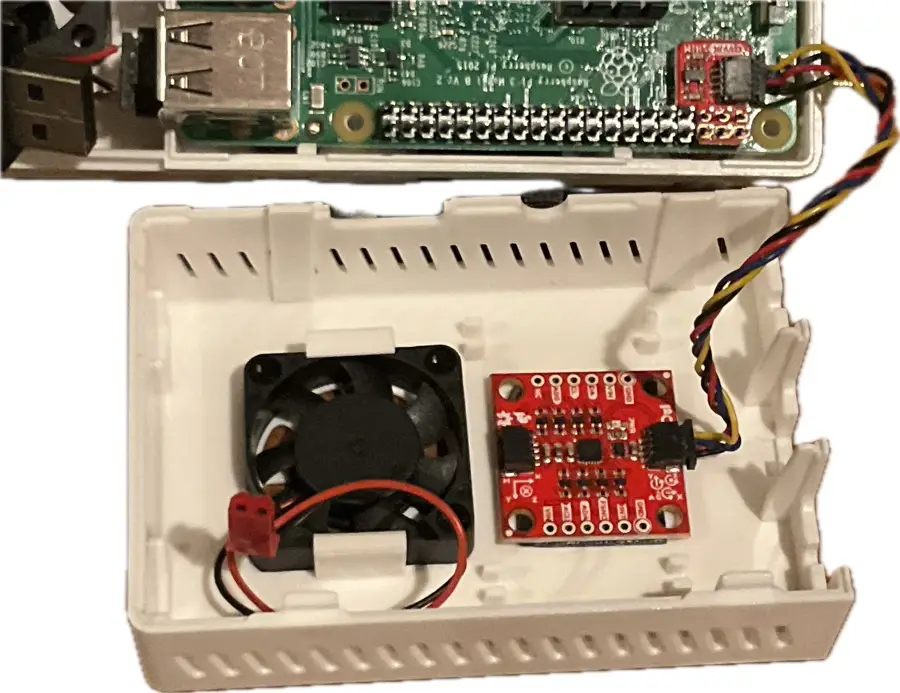
- Install the lower cooling fan underneath the SDRs and the upper fan above the Pi CPU.
- Place heat sinks on the Raspberry Pi chipsets for added thermal stability.
AHRS and IMU Integration
If you’re adding an AHRS module for attitude data, it should be mounted securely to avoid vibration. Many builders use a SparkFun 9DoF IMU with a Qwiic breakout header for simplified wiring.
- Mount the IMU to the inside top cover of the case using screws or adhesive.
- Ensure the IMU is level and aligned with the flight axis of the aircraft.
- s
- Connect via I2C (typically routed from the Pi’s GPIO header or a Qwiic-to-USB adapter).
Power and Cooling Considerations
Stratux hardware generates moderate heat due to the Raspberry Pi, SDRs, and GPS module all running simultaneously. Managing power and thermal conditions is essential for reliable in-flight performance.
Power Supply Recommendations
- Use a high-quality USB power bank capable of delivering at least 2.4A at 5V
- Consider using a battery with USB-C output for cleaner power on Pi 4 models
- Some users prefer integrating a 12V-to-5V step-down converter wired to the aircraft power system (check legality and safety compliance)
Cooling Tips
- Install dual fans: one under the SDRs (intake) and one above the Pi CPU (exhaust)
- Add heatsinks to the Pi’s CPU, RAM, and USB controller chips
- Leave air gaps near the vents in the case; do not block airflow
- Monitor temperature via the Stratux web UI to confirm effectiveness
In-Flight Considerations
- Avoid mounting the unit in direct sunlight; it can overheat quickly
- Secure the unit to prevent vibration or shifting during flight
- Check power connectors before takeoff — loose cables are a common issue
With solid cooling and power, Stratux is capable of running for hours without issue, even in warm cockpit environments.
Final Assembly Notes
Before closing the case:
- Check all connections
- Route cables to prevent interference or damage
- Power on the unit to verify SDR and GPS detection (status can be checked via the Stratux web interface)
Once verified, snap the enclosure shut and secure any suction cup mounts or external antenna cabling. Your Stratux receiver is now physically complete and ready for software setup.